Inspections have been one of the Work Centers for a little while now – starting with version 7.6.1.1 (if they’re not visible, your administrator may have enable them through Object Structure configuration in Security Groups – see this link from IBM - https://www.ibm.com/docs/en/mam/7.6.0.9?topic=centers-object-structures-work).
By nature of the technology, the work center applications play well on mobile devices and tablets, automatically scaling to display the Inspection form. Inspections can range from simply recording an operating meter reading to a comprehensive multi-point inspection with inspection text documentation, date, or check-box fields.
Use case examples:
- Collecting operating hours for mobile equipment using meter-based PMs
- Entering readings (gauge, characteristic meters) for condition monitoring point data
- Evaluating the condition of asset by completing a multiple-choice condition review
- Entering descriptive text that evaluates condition or needed corrective actions of an asset
But how do you build a route for gathering inspection data, a route that relates the inspection results back to an asset (or location) on the route? The IBM solution is great, build an Inspection form, associate it with any number of assets by using a route. You can then associate the route with a PM for scheduled inspections or associate the route directly with a work order for ad-hoc inspections. Data gathered in the work center inspection carries over to the asset’s meter(s) and condition monitoring points.
The general process is:
- Create the meter(s), associate them with an asset (Continuous) or a condition monitoring point (Gauge, Characteristic)
- Build the inspection forms, create questions as needed. Use Asset Data -> Meter Readings, using the meter from step 1 above

- After making the inspection form active, associate the inspection form with the asset
- Asset application -> More Actions à Associate Inspection Form
- Not necessary but makes it easier to associate the form with a work order or route
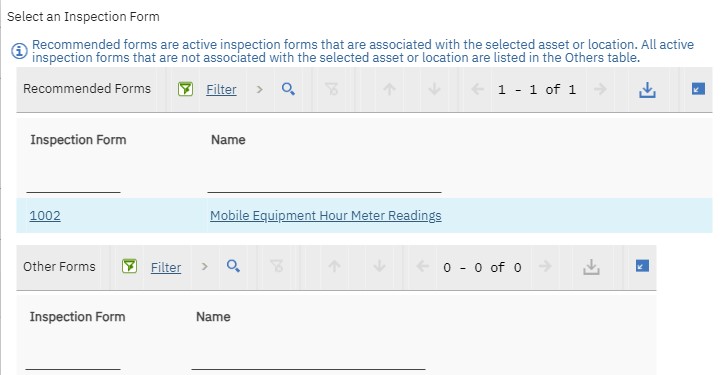
- Build the route, listing the asset and the inspection form defined above. Depending on the “route stops become” option selected, you enter inspection results for individual assets differently (see below)
- Associate the route with a PM for scheduled inspections or associate the route directly with a work order for ad-hoc inspections
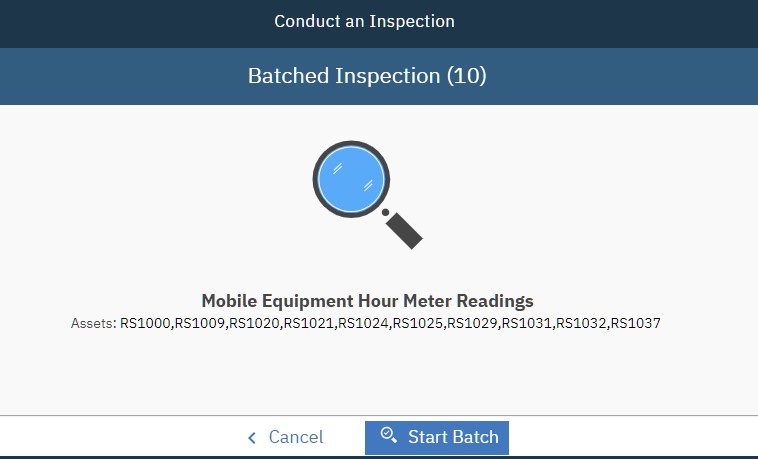
- To enter the inspection readings – More Actions -> Enter Inspection Results
- This enables you to enter inspection results ‘in batch’ for all assets on the route
- This can be done for any WO in the hierarchy if using WO hierarchies for the route stop
- If your route stops are in the Multiple Assets, Locations and CIs table, you can enter individual asset inspection data in the table row for that asset
- If your route stops are tasks, you can enter individual asset inspection data for the task related to the asset
- If your route stops are child work orders, you can enter individual asset inspection data for the task related to the asset
- Of note – the inspection results do not populate the asset record until the inspection is “Complete”


